SCREEN PRINTING
Screen printing is a printing technique that uses a woven mesh stretched over a wooden frame to support an ink-blocked stencil to receive a desired image. Ink is moved across the mesh using a squeegee. The squeegee forces the into into the mesh openings transferring the design onto the surface beneath. There are two different types of stencils photographic and paper. To print a photographic stencil the mesh is coated with a light sensitive emulsion which when dries blocks holes in the mesh. To expose one onto a coated screen the image needs to be a positive image printed on either acetate or folex. to achieve a good quality image the design needs to be solid black. This film positive and the screen are exposed to uv light. The screen is than washed with a jet to reveal the image. Then using a squeegee and acrylic mixed with a printing medium, its pulled across the mesh to reveal the image.
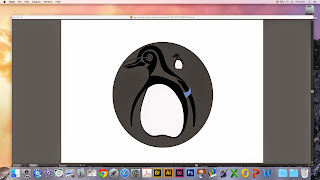
We used this technique to achieve a basic understanding of how posters can be created.
EQUIPMENT:
- Squeegee
- Stencil ( news paper)
- Photographic stencil
- Screen (mesh and wooden frame)
- Acrylic paint mixed with printing medium.
- Cutting mat and craft knife
Method:
- First you need draw you stencil on news print, then using a craft knife carefully cut out your stencil.
- Then using brown tape, tape up around the edges of the frame and any parts you don't want printed. Make sure to cover your area with news paper.
- Place your paper under the frame.
- Apply the ready mixed acrylic, close to the area you want to print but not on the design.
- Than either using clamps or getting someone to tightly told the frame, pull the squeegee at a 45 degree angle towards you in a firm motion. Make sure the pressure is even.
- Carefully remove the screen from the paper underneath, put the print on a drying rack.
- Take the tape off your screen and put any excess ink back into the pot and wash the screen.
- Make sure you keep your area clean. When you're not printing clean the screen, if you don't the ink will dry out.
Method for photographic screen:
- The methods are exactly the same except you don't need to do a stencil.
Health & Safety
- Keep room well ventilated
- Do not inhale the pigments/chemicals
- Keep your area clean and tidy
Shepard Fairey is an American contemporary street artist, who emerged from the skateboarding scene. He is best known for this posters produced during the election in america for Obama. He uses simple colours such as black, white and red. His work combines elements from graffiti, pop art, buisness art and marxist theory. His main mediums are often stencilling, collage and screen printing, to produces very bold pieces of work that relate to the problems facing the world in the current times. He is very much an important artist to look at when it comes to creative advertisement, although he has been done for plagiarism, there isn't a defined line between his work and Andy Worhol, who is now a celebrated artist.